
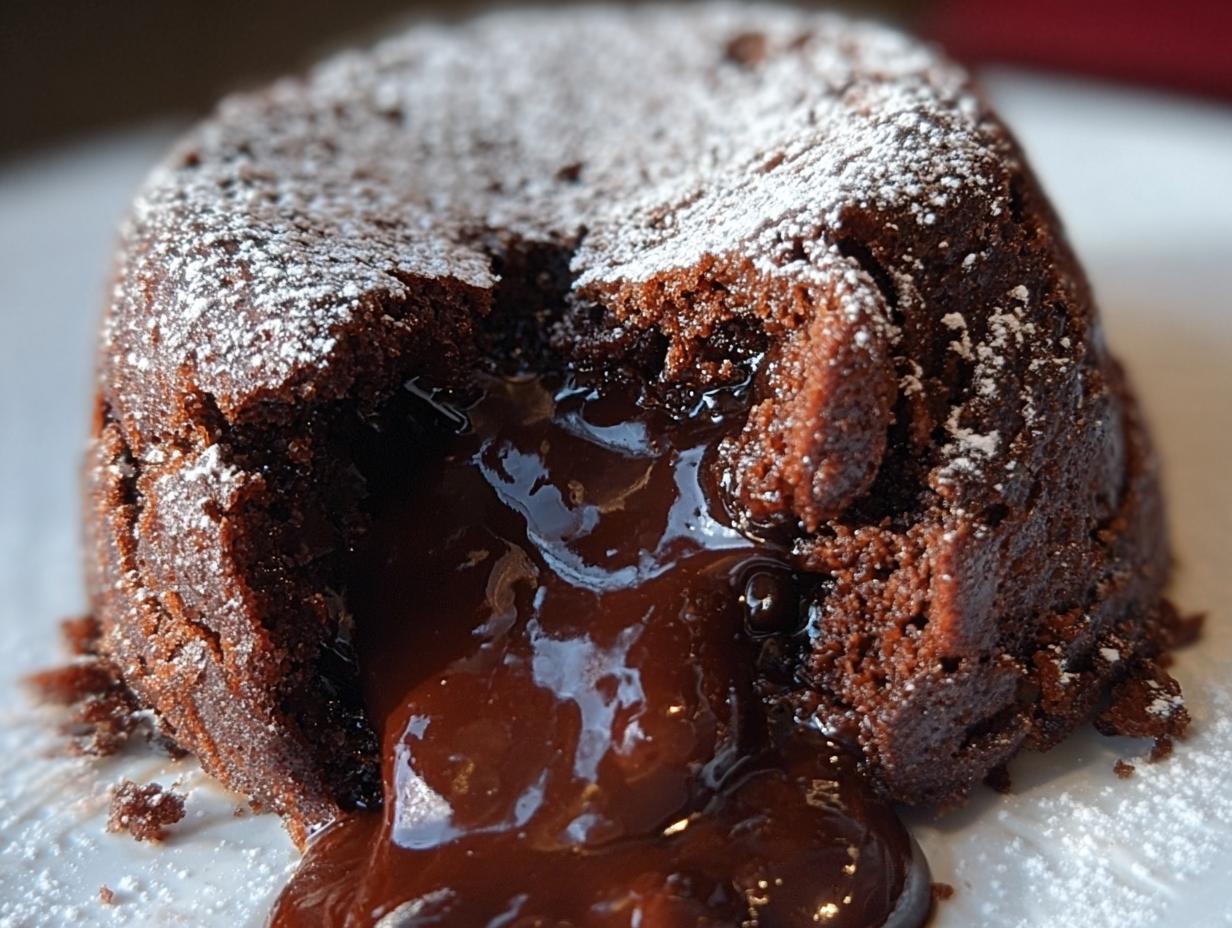
Ah, the magic of Chocolate Lava Cake! I can still remember the first time I had it—my best friend’s birthday party. We were all gathered in the kitchen, and when she cut into that little cake, a river of molten chocolate flowed out, and it felt like a scene straight out of a movie. Everyone gasped in delight! From that moment on, I knew I wanted to recreate that experience for my family. It’s the kind of dessert that feels special but is surprisingly easy to whip up, making it perfect for any occasion, whether it’s a cozy date night or a festive gathering.
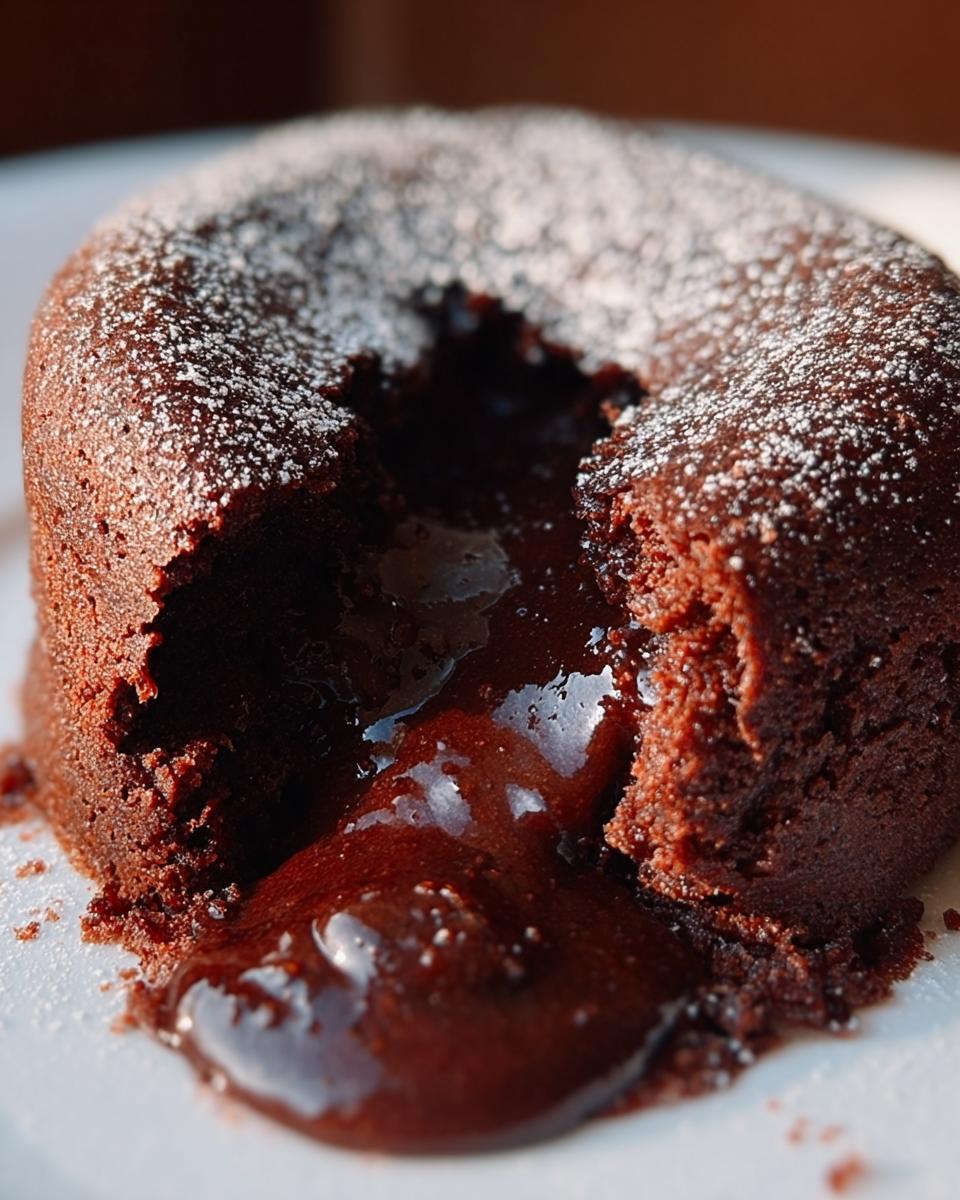
As the weather cools down and the holidays approach, there's nothing quite like the warmth of a freshly baked Chocolate Lava Cake to gather everyone around the table. It's a delightful treat that brings smiles and joy, with its rich, gooey center that oozes happiness! Trust me, you’ll want to save this recipe—it’s bound to become a cherished favorite in your home, just like it is in mine.
Why You’ll Love "Chocolate Lava Cake"
- Quick prep time of just 10 minutes makes it a perfect last-minute dessert.
- Minimal ingredients ensure you won’t have to run to the store—most are pantry staples!
- Rich and indulgent, it’s a crowd-pleaser that impresses family and friends.
- Made in individual custard cups, perfect for portion control and serving.
- Can be easily adapted for special occasions or a cozy night in.
- Leftovers (if you have any!) can be stored for a day or two in the fridge.
Ingredients You’ll Need
- 4 ounces semisweet baking chocolate, chopped (I love using Ghirardelli or Baker's for that rich flavor!)
- 2 tablespoons unsalted butter, at room temperature (plus more for greasing custard cups)
- 2 tablespoons sugar (and a little extra for dusting the custard cups)
- 2 large eggs (make sure they’re fresh for the best results!)
- 2 tablespoons all-purpose flour (don’t worry if you need a gluten-free option; use a 1:1 gluten-free flour blend!)
- ⅛ teaspoon kosher salt (this really enhances the chocolate flavor!)
Step-by-Step Instructions
Preheat the Oven
- First things first, preheat your oven to 425°F (220°C). This is key for achieving that perfect gooey center!
- While that’s heating up, grab your custard cups. Grease them generously with butter, and then dust them with a little sugar. This will help the cakes release easily once they’re baked.
Make the Chocolate Mixture
- In a microwave-safe bowl or using a double boiler, melt the chopped semisweet chocolate and butter together. Stir until it’s smooth and silky. If you’re using a microwave, do it in 30-second intervals to avoid burning the chocolate. We want it melty, not crunchy!
Combine Eggs and Sugar
- In another bowl, whisk together the two large eggs and the sugar until the mixture becomes thick and pale. You’re looking for a lovely ribbon-like texture when you lift the whisk. It should be fluffy and sweet!
- Once that’s achieved, gently stir in the melted chocolate mixture. This is the moment when your kitchen starts smelling like heaven!
Fold in Dry Ingredients
- Now, it’s time to fold in the dry ingredients! Sprinkle the flour and kosher salt over the chocolate mixture and gently fold it in. Take your time here; you want everything to be just combined. Don’t worry if it looks a little runny—that’s normal!
Fill Custard Cups
- Carefully pour the batter into the prepared custard cups, filling them about halfway. This gives them room to rise and create that glorious lava effect!
Bake and Serve
- Pop those cups into the preheated oven and bake for about 12 minutes. Keep an eye on them; you want the edges to be firm but the centers should still be soft and jiggly.
- Once they’re done, let them cool for just a minute. Then, invert each cup onto a plate. Give it a gentle tap if needed, and watch as the molten chocolate lava flows out. Serve immediately, and if you’re feeling extra indulgent, add a scoop of vanilla ice cream on top!
Variations
- For a fruity twist, add a tablespoon of raspberry or cherry jam into the center before baking.
- Try using dark chocolate for a richer taste or white chocolate for a sweeter version.
- Make it gluten-free by substituting the all-purpose flour with a 1:1 gluten-free blend.
- Add a dash of espresso powder to enhance the chocolate flavor.
- For a lighter option, use egg substitutes like unsweetened applesauce or flaxseed meal mixed with water.
Serving and Storage Tips
Serving
These Chocolate Lava Cakes are best served warm right out of the oven. Pair them with a scoop of vanilla ice cream or a dollop of whipped cream for that extra indulgence. Fresh berries also make a lovely garnish—plus, they add a pop of color on the plate!
Storage
If you happen to have leftovers (which is rare!), store them in the fridge for up to 2 days. Just reheat them in the microwave for about 15-20 seconds before serving to get that gooey center back. Avoid freezing, as it can alter the texture of the cake!
Helpful Notes
- For a richer chocolate flavor, consider using higher quality chocolate like Valrhona.
- If you're out of unsalted butter, salted butter works too—just skip the added salt.
- Feel free to add a splash of vanilla extract to the egg mixture for an extra depth of flavor.
- For those with egg allergies, a flax egg (1 tablespoon ground flaxseed mixed with 2.5 tablespoons water) can be used as a substitute.
- Dusting the cups with cocoa powder instead of sugar can enhance the chocolatey taste.
Frequently Asked Questions
Can I freeze Chocolate Lava Cake?
No, it’s not recommended to freeze Chocolate Lava Cake as it can alter the texture and gooey center that makes it so special. It’s best enjoyed fresh out of the oven!
What can I substitute for eggs?
You can use a flax egg (1 tablespoon ground flaxseed mixed with 2.5 tablespoons water) or ¼ cup unsweetened applesauce for each egg. Both options work well and keep the cake moist!
How do I know when it’s done baking?
The edges should look firm, but the center should still be jiggly when you gently shake the custard cups. If the center is set, it’s overbaked; aim for that luscious, molten center!
Final Thoughts
There you have it—your very own recipe for Chocolate Lava Cake! I can’t wait for you to try this one. It’s a dessert that’s sure to impress everyone, from family to friends, and it’ll fill your kitchen with that irresistible chocolate aroma. Remember, the beauty of this cake lies in its simplicity and that unforgettable molten center. So, roll up your sleeves, get your ingredients ready, and enjoy the process. I promise you’ll create some sweet memories along the way. Happy baking, and here’s to many delightful chocolate experiences ahead!
Chocolate Lava Cake
Ingredients
Equipment
Method
- Preheat your oven to 425°F (220°C). Grease the custard cups with butter and dust with sugar.
- Melt the chocolate and butter together in a bowl. Stir until smooth.
- In another bowl, whisk together the eggs and sugar until thick. Stir in the melted chocolate mixture.
- Fold in the flour and salt until combined.
- Pour the batter into the prepared custard cups, filling them halfway.
- Bake for 12 minutes. Let cool for 1 minute, then invert onto plates and serve immediately.

Leave a Reply