
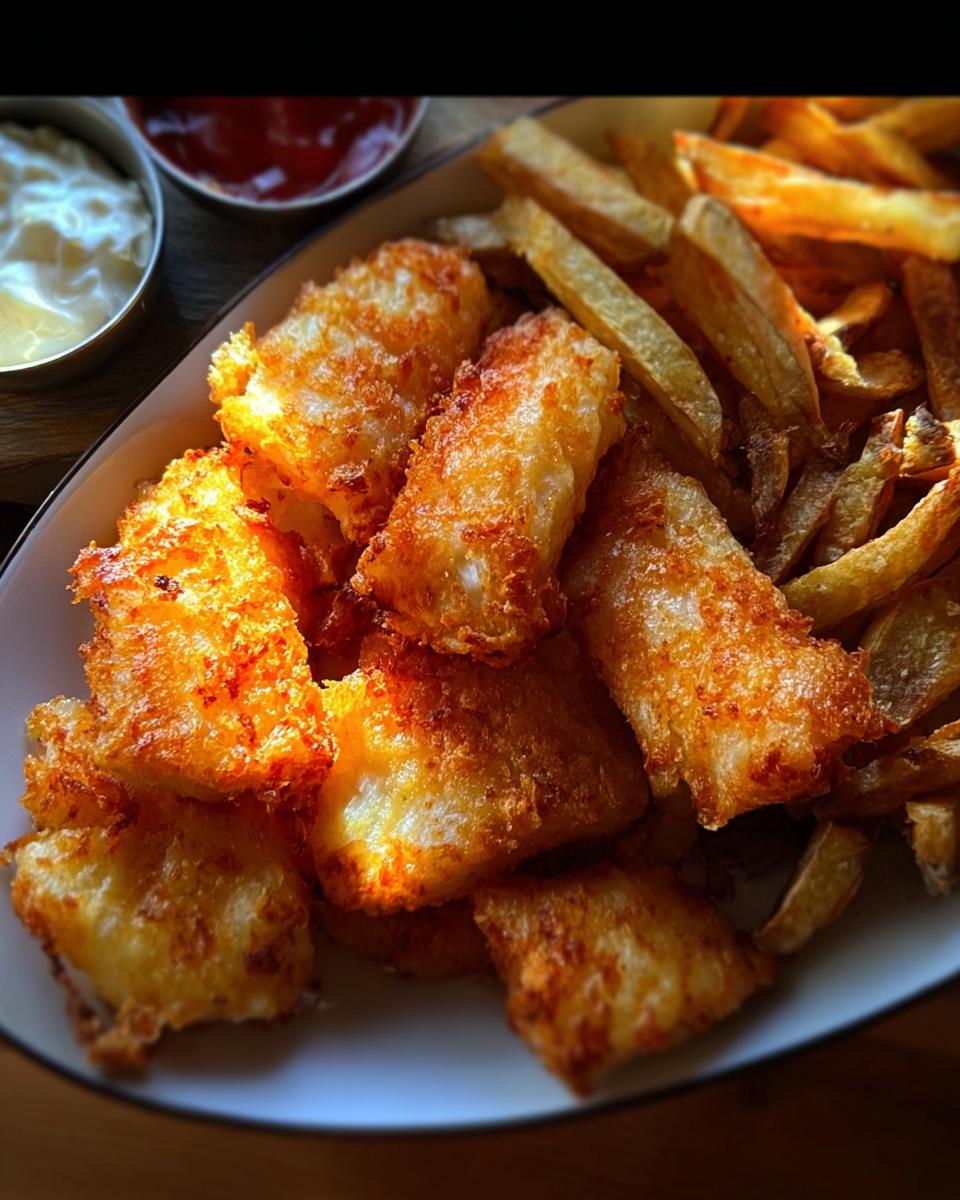
Fish & Chips has always held a special place in my heart, reminding me of the cozy seaside towns where I spent my summer holidays as a kid. I can still hear the sound of waves crashing along the pier, with the salty air wrapping around me, and the enticing scent of fried fish wafting from little stalls. There was something magical about that crispy, golden coating, paired with fluffy chips, that made every bite feel like a celebration. Whether it was a treat after a long day at the beach or a comforting meal shared with family, Fish & Chips always brought a smile to my face.
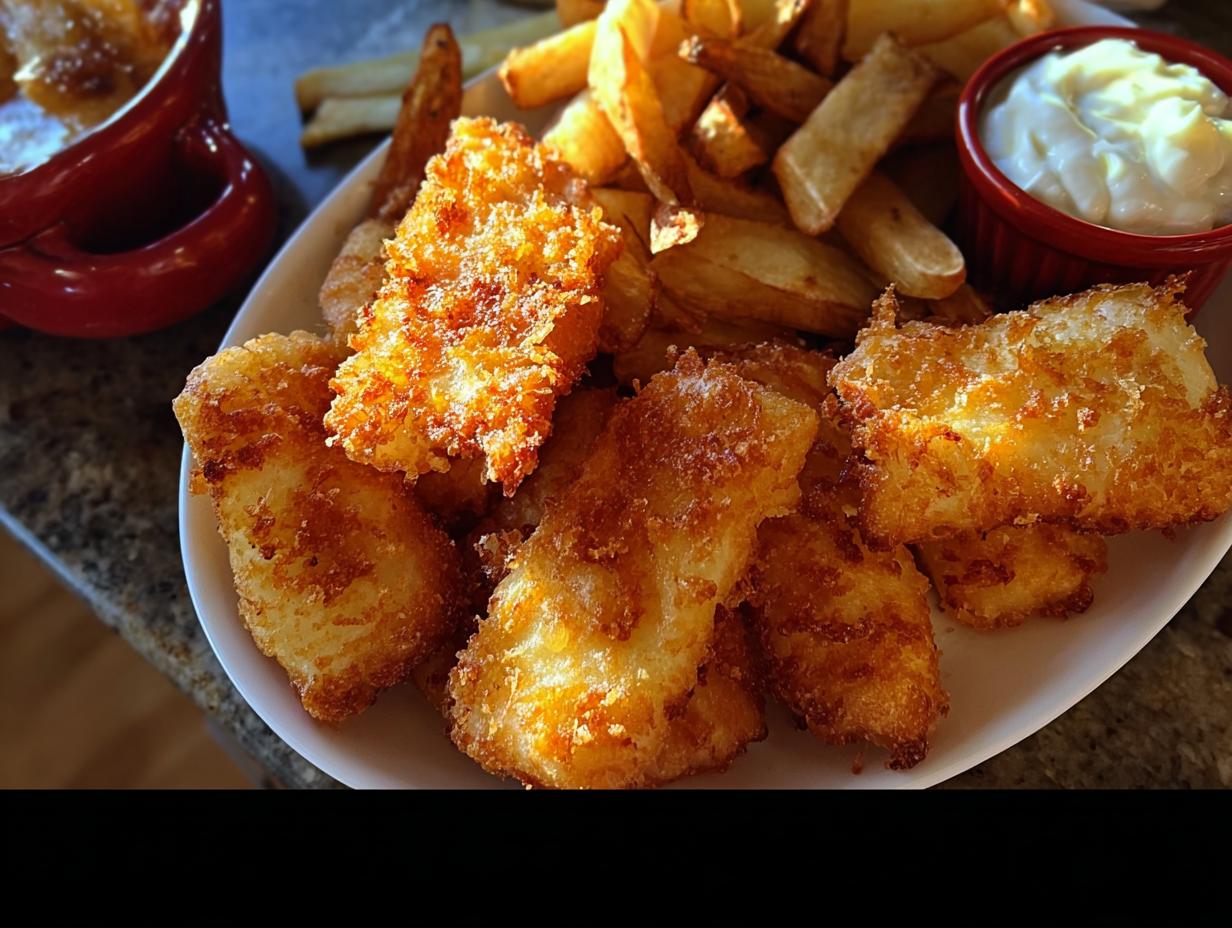
This recipe is not just about the nostalgic flavors; it's perfect for any occasion, whether you’re hosting a casual Friday night dinner or looking to impress guests with a British classic. With just a handful of ingredients and a quick cooking time, you’ll have a delightful dish that’s sure to become a family favorite. So roll up your sleeves and get ready for some crispy, golden goodness that’ll transport you straight to the seaside!
Why You’ll Love "Fish & Chips"
- Quick prep time of just 20 minutes, making it perfect for busy weeknights.
- Minimal ingredients mean you won’t have to make an extra trip to the store.
- Family-friendly and sure to please even the pickiest eaters.
- Freezer-friendly, so you can always have a batch ready for a last-minute meal.
- Easy to customize with different flavors and dipping sauces.
- Deliciously crunchy coating that’s hard to resist!
Ingredients You’ll Need
- 1 cup rice flour (a great gluten-free alternative to regular flour)
- 1 teaspoon kosher salt (for enhanced flavor)
- 2 whole eggs, beaten (large eggs work best for a good batter)
- 1 bag (7.35 ounces) salt & vinegar chips, crushed (these give an amazing tangy flavor and crunch)
- 5 fillets frozen flounder (6-8 ounces each, cut in half for easier frying)
Step-by-Step Instructions
Prepare the Batter
Mix Dry Ingredients
- Grab a medium bowl and add 1 cup of rice flour and 1 teaspoon of kosher salt. Give it a good whisk until they’re well combined. This will be the base for your batter.
Add Eggs
- In a separate bowl, beat the 2 whole eggs until they’re nice and frothy.
- Now, slowly pour the beaten eggs into the bowl with the rice flour mixture. Stir it all together until you have a smooth batter. Don’t worry if it looks a little thick; you’re on the right track!
Coat the Fish
Prepare Flounder
- Take your 5 fillets of frozen flounder and cut each one in half. This makes them easier to handle and fry, plus they’ll cook faster!
Double Coating Tip
- Now, here comes the fun part! Take each piece of flounder and dip it into the batter, making sure it's fully coated.
- Next, transfer the battered fish to the bowl of crushed salt & vinegar chips. Press them down gently to ensure the chips stick nicely to the fish.
- If you want that extra crunch (and trust me, you do!), dip the coated fish back into the batter and then back into the crushed chips for a double coating. It’s a game-changer!
Variations
- Swap the flounder for cod or haddock for a different flavor profile.
- Add spices like paprika or cayenne pepper to the batter for an extra kick.
- Use different flavored chips, like barbecue or cheese, to change up the coating.
- Try making a lighter version by air frying instead of deep frying.
- For a dairy-free option, ensure your chips and batter contain no dairy ingredients.
Serving and Storage Tips
Serving
Serve your Fish & Chips hot, straight from the fryer for the best crunch. Pair it with a side of tartar sauce or malt vinegar for that classic touch. A fresh green salad or mushy peas make great accompaniments to balance the meal. For a refreshing drink pairing, consider trying Agua de Frutas.
Storage
Store any leftovers in an airtight container in the fridge for up to 2 days. For longer storage, freeze the coated fish before frying; they can last up to 3 months. Reheat in the oven to keep them crispy!
Helpful Notes
- If you don't have rice flour, you can substitute with all-purpose flour, but it won’t be gluten-free.
- Feel free to add fresh herbs like parsley or dill to the batter for an extra burst of flavor.
- For a spicier kick, try adding a pinch of chili powder to the crushed chips.
- Ensure your chips are gluten-free if you're making this dish for someone with gluten allergies. For more information on gluten-free diets, consult resources from the Celiac Disease Foundation.
- Leftover batter can be stored in the fridge for a day; just stir again before using!
Frequently Asked Questions
Can I freeze Fish & Chips?
Yes, you can freeze the coated fish before frying. Just place the battered fish on a baking sheet lined with parchment paper and freeze until solid. Then transfer them to an airtight container or freezer bag. They can last up to 3 months in the freezer.What can I use instead of rice flour?
You can substitute rice flour with all-purpose flour if you're not concerned about gluten. If you're looking for a gluten-free option, try using cornstarch or almond flour.How do I make Fish & Chips gluten-free?
To make Fish & Chips gluten-free, use rice flour for the batter and ensure your chips are also gluten-free. Always double-check labels when buying pre-packaged ingredients! For more on gluten-free cooking, explore resources on gluten-free diets.Final Thoughts
So there you have it, my delightful take on Fish & Chips! I hope you feel inspired to try this recipe and create your own memories around the dinner table. Whether it’s a fun family night or a special occasion, this dish is sure to bring smiles and satisfaction. Don’t be afraid to get a little messy and have fun with the process. Remember, cooking is all about joy, and I can’t wait for you to experience the crispy, flavorful goodness of this classic dish. Happy cooking, and enjoy every crunchy bite!
Fish & Chips
Ingredients
Equipment
Method
- Prepare the batter by mixing rice flour, kosher salt, and beaten eggs in separate bowls.
- Coat each flounder piece in the batter and then in the crushed chips.


Leave a Reply